
My baking has really suffered lately because it’s just been too hot to bake. I live in the Seattle area where everyone says that it’s too mild to need air conditioning. This is usually true, but not this week! Seattle set an all-time high record on Wednesday, 103 degrees. I live further away from the water so it was even warmer where I live. In addition to the 100 degree day, it’s been in the 90s since Sunday. Now this wouldn’t be so bad if it were only hot outside, but since I have no air conditioning at home, if it is 100 degrees outside it is also 100 degrees inside.
My husband had sent me a website with no-bake recipes, so that’s what I ended up doing. In all honesty, it was too hot to even make no-bake cookies, as I’m drenched in sweat it if get up and walk to another room! These were fairly easy to put together and they taste really great, but I wouldn’t advise doing anything if your house is 100 degrees inside. Go to the mall or to the movies and stay cool!
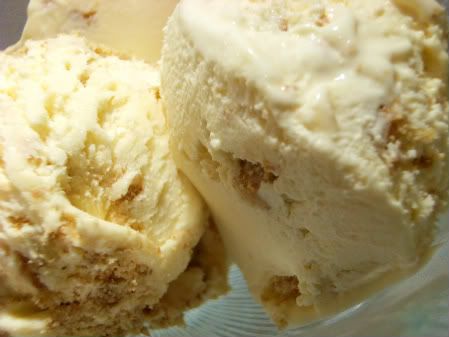
I made some changes to this recipe. The original recipe calls for graham cracker crumbs and I didn’t want to use those. I’d recently had a cookie with a graham cracker crust and it was so overpowering. I figured any type of cookie crumbs would work, so I used vanilla wafers. I don’t think I used quite 3 cups, but I was fairly close to that. The recipe also said to use 1-1/2 cups of butter (3 sticks) which just seemed like so much butter for a recipe that fits into a 9 inch square pan. I mixed in half that amount and it seemed like things were cohesive enough so I didn’t add any more.

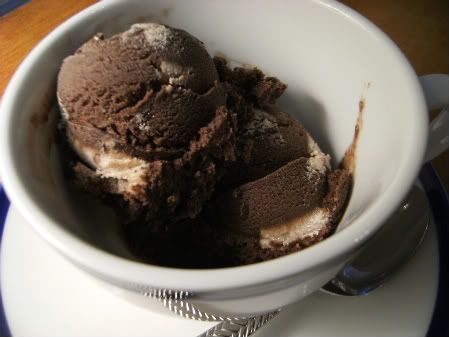
These are really great cookies for no-bakes; if you didn’t know they were no-bake cookies I don’t think that you would guess that they were. The topping is excellent and these taste a lot like a peanut butter cup. I’m glad that I used vanilla wafer crumbs, since they have a nice light flavor. I thought about making these cookies with nutella, which I think would be really good. For that I would probably use some sort of nut cookie crumbs, just to enhance the flavor. I’m really glad that I made these, even though it was so hot when I did. If you’re stuck in a too-hot house and feel the need to make cookies, give these a try.
1 3/4 cups powdered sugar
1 1/2 sticks butter, softened
1 cup peanut butter
1 tsp. vanilla
3 cups vanilla wafer crumbs
1 cup chopped peanuts
2 cups chocolate chips
1/4 cup peanut butter
Line a 9x9x2 inch pan with aluminum foil. (Leave about 1 inch hanging over the opposite sides so you can lift the bars easily from the pan.)
In a large bowl, mix the powdered sugar, butter, 1 cup peanut butter, and vanilla. Stir in the vanilla wafer crumbs and peanuts. (The mixture will be stiff.) Press mixture into the pan.
Over low heat stir together the chocolate chips and 1/4 cup peanut butter until smooth. Spread over the mixture in the pan. Cover and refrigerate about an hour or until the chocolate is set. Remove from the pan and cut the bars into 36 squares. Refrigerate about 2 hours or until firm. Refrigerate any leftovers.
Recipe from Rachel Keller, http://www.allhomemadecookies.com/recipes/nobake/nbpeanutbuttersq.htm
No-Bake Peanut Butter Squares
My baking has really suffered lately because it’s just been too hot to bake. I live in the Seattle area where everyone says that it’s too mild to need air conditioning. This is usually true, but not this week! Seattle set an all-time high record on Wednesday, 103 degrees. I live further away from the water so it was even warmer where I live. In addition to the 100 degree day, it’s been in the 90s since Sunday. Now this wouldn’t be so bad if it were only hot outside, but since I have no air conditioning at home, if it is 100 degrees outside it is also 100 degrees inside.
My husband had sent me a website with no-bake recipes, so that’s what I ended up doing. In all honesty, it was too hot to even make no-bake cookies, as I’m drenched in sweat it if get up and walk to another room! These were fairly easy to put together and they taste really great, but I wouldn’t advise doing anything if your house is 100 degrees inside. Go to the mall or to the movies and stay cool!
I made some changes to this recipe. The original recipe calls for graham cracker crumbs and I didn’t want to use those. I’d recently had a cookie with a graham cracker crust and it was so overpowering. I figured any type of cookie crumbs would work, so I used vanilla wafers. I don’t think I used quite 3 cups, but I was fairly close to that. The recipe also said to use 1-1/2 cups of butter (3 sticks) which just seemed like so much butter for a recipe that fits into a 9 inch square pan. I mixed in half that amount and it seemed like things were cohesive enough so I didn’t add any more.
These are really great cookies for no-bakes; if you didn’t know they were no-bake cookies I don’t think that you would guess that they were. The topping is excellent and these taste a lot like a peanut butter cup. I’m glad that I used vanilla wafer crumbs, since they have a nice light flavor. I thought about making these cookies with nutella, which I think would be really good. For that I would probably use some sort of nut cookie crumbs, just to enhance the flavor. I’m really glad that I made these, even though it was so hot when I did. If you’re stuck in a too-hot house and feel the need to make cookies, give these a try.
1 3/4 cups powdered sugar
1 1/2 sticks butter, softened
1 cup peanut butter
1 tsp. vanilla
3 cups vanilla wafer crumbs
1 cup chopped peanuts
2 cups chocolate chips
1/4 cup peanut butter
Line a 9x9x2 inch pan with aluminum foil. (Leave about 1 inch hanging over the opposite sides so you can lift the bars easily from the pan.)
In a large bowl, mix the powdered sugar, butter, 1 cup peanut butter, and vanilla. Stir in the vanilla wafer crumbs and peanuts. (The mixture will be stiff.) Press mixture into the pan.
Over low heat stir together the chocolate chips and 1/4 cup peanut butter until smooth. Spread over the mixture in the pan. Cover and refrigerate about an hour or until the chocolate is set. Remove from the pan and cut the bars into 36 squares. Refrigerate about 2 hours or until firm. Refrigerate any leftovers.
Recipe from Rachel Keller, http://www.allhomemadecookies.com/recipes/nobake/nbpeanutbuttersq.htm


0 comments: